

How To Draw The Street Light Post
We are in a fun and heady new stage of parenthood: schoolhouse dances, graduations and weddings! These moments gave me the opportunity to aggrandize my decorating experience with lots of budget DIY party decorating ideas here on the blog. I hope you enjoy our projects! See all of our party and effect planning ideas here.
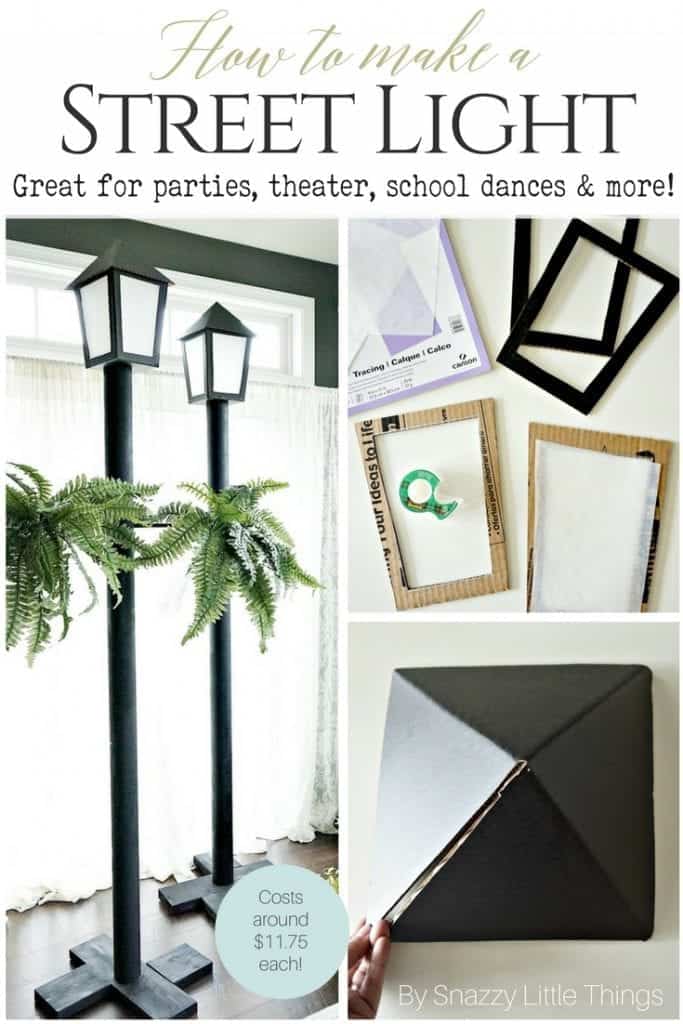
DIY Street Light for Parties
Masquerade Political party Ideas
My daughter's 8th course formal was a "Masquerade" in a New Orleans style street setting. We transformed her unabridged school into the French Quarter in New Orleans. I created these plans for all the volunteers to have a map of the school and how to decorate information technology in zones.

And here is a glimpse of the real school decor…information technology turned out so cute! The kids were then excited!
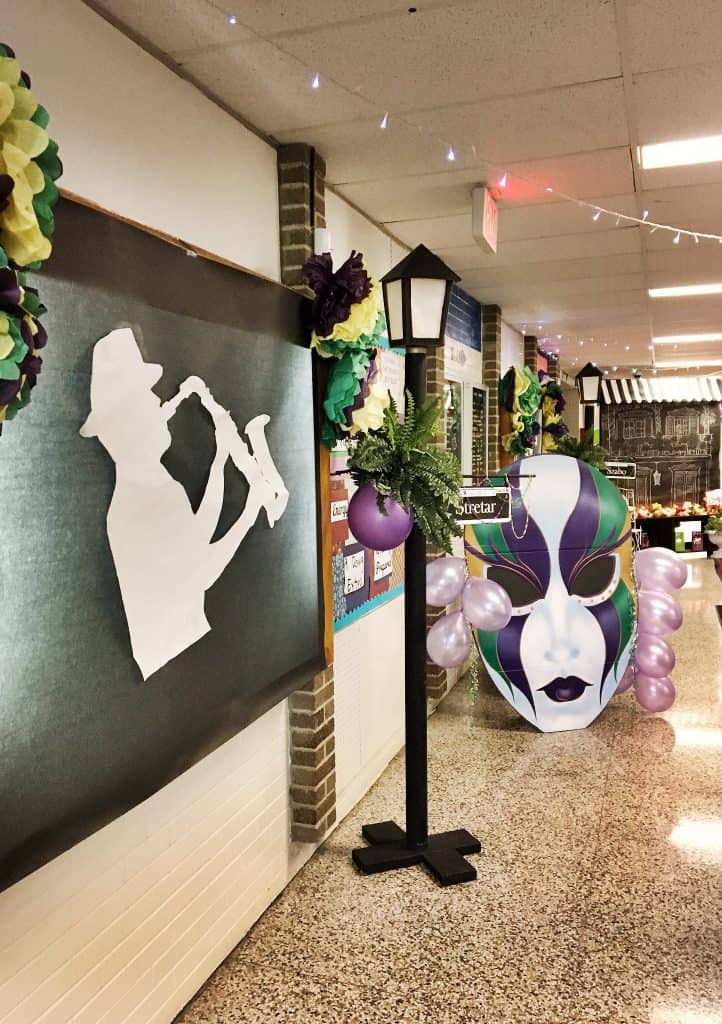
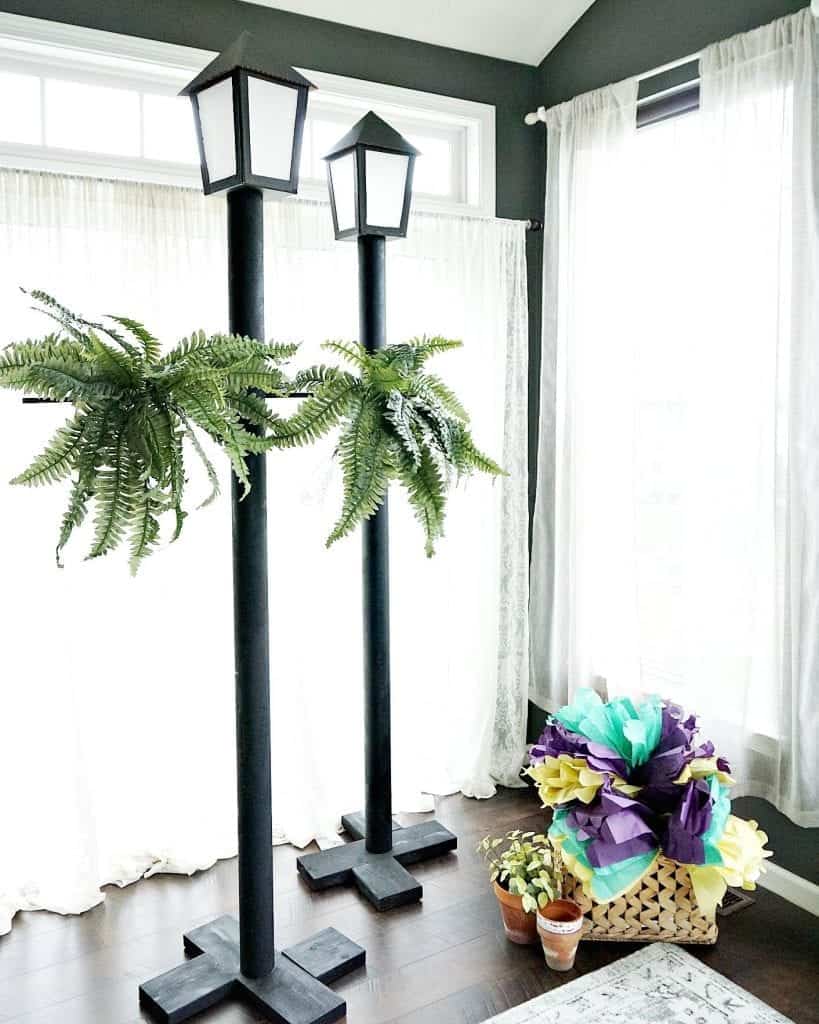
See the unabridged school transformed here. The halls were lined with pretty building facades with awnings, street lights adorned with hanging ferns and Spanish moss. We also used some of the aforementioned decorations for my son's prom.
I ended up being the chair of the decorating committee which gave me the adventure to unleash some creativity. Making the street lights look realistic was my goal – I felt the lamps could fit most any theme for futurity dances. I pictured these for Halloween decorating, school plays, church events or any elegant theme in the future.
How to Make the Street Lights

Yous'll need:
- Lantern design (for purchase and instant download)
- Black Corrugated Cardboard
- Tracing Paper
- Box Opener / Cutter
- Black masking tape
- Metal straight edge
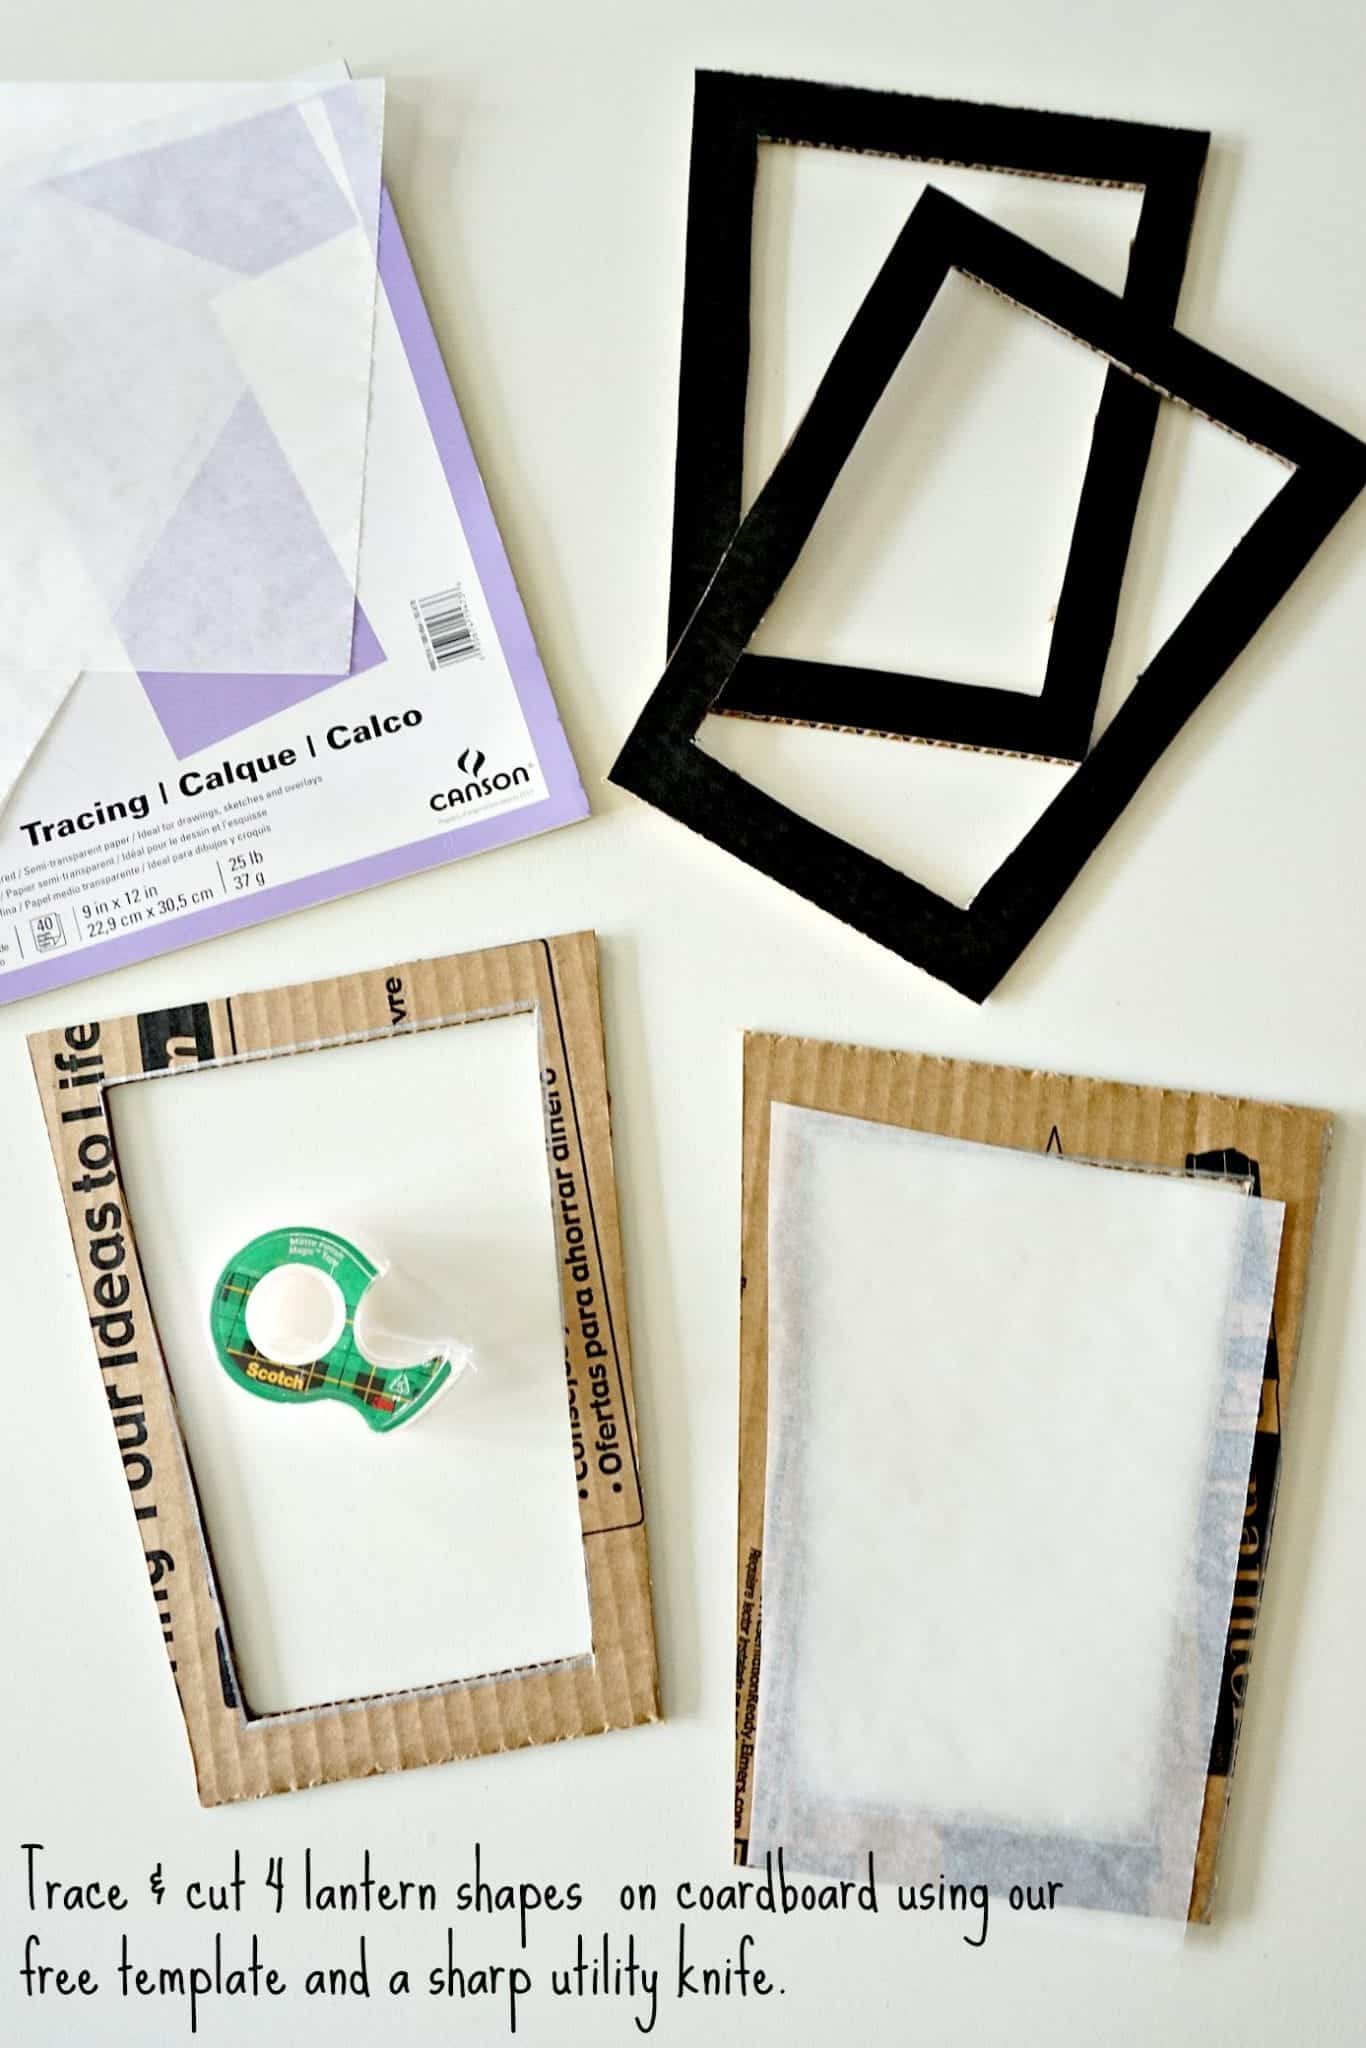
Instructions: I suggest assigning a single job beneath to any volunteers if you lot're coordinating a grouping crafting issue. Associates line crafting worked wonders for us! Download and print our pattern on 8.5″ 10 11″ paper. Cut out the design, then trace the outline of the lantern onto the back of your corrugated cardboard.

One time you describe the design onto the paper-thin, information technology's time to cut. Use the metallic direct edge and a abrupt box cutter, cut out the shapes, four per lantern. Side by side, create your faux "windows" using white tracing newspaper. Adhere paper "windows" on the brown side of your lanterns using Scotch record at the 4 corners. (Tip! For Halloween you lot tin can besides use green, imperial or orange paper for your lantern windows).
Side by side, it's time to assemble the lantern. Space them out evenly, leaving a gap between each lantern window. So tape with the slight gap using black masking tape:
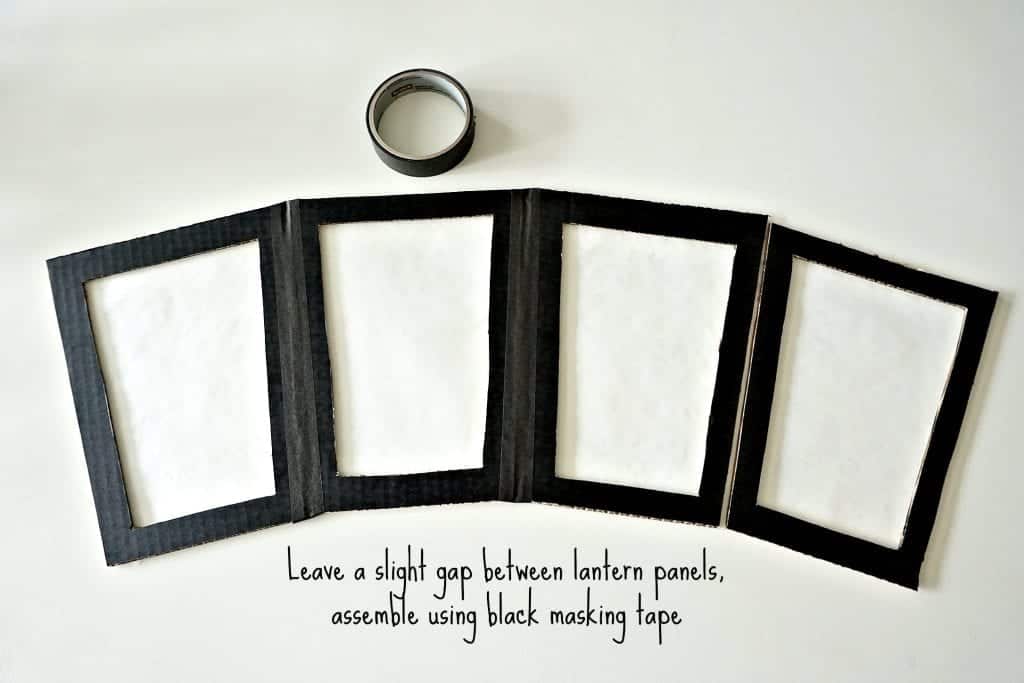
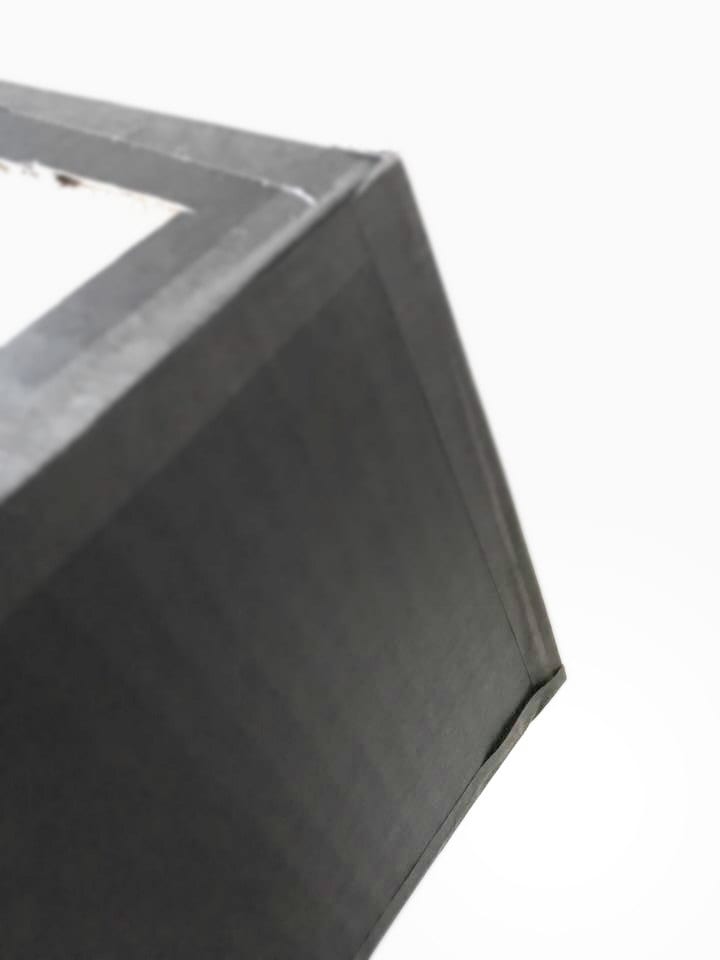
Once all the lantern parts are assembled, stand up information technology upright on your piece of work surface:

After you lot tape your lantern completely together, add the lesser (square template) to hold it'due south shape. I notched the ends of the record so the tape lays flat.
Time to brand the lid using our free triangle template. Create four adjoining triangles, like the diagram beneath. Lightly score in between triangles on the underside:
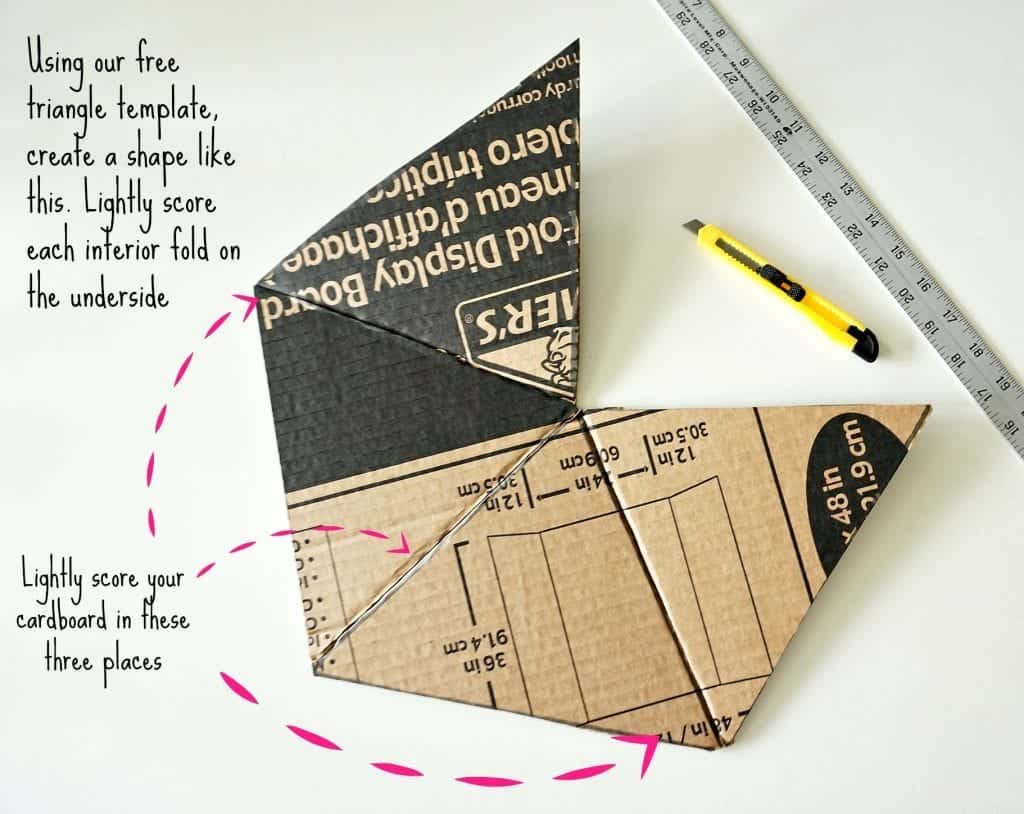
Fold the lid where it's been slightly scored. This forms the pyramid. Secure the last seam with black masking tape.
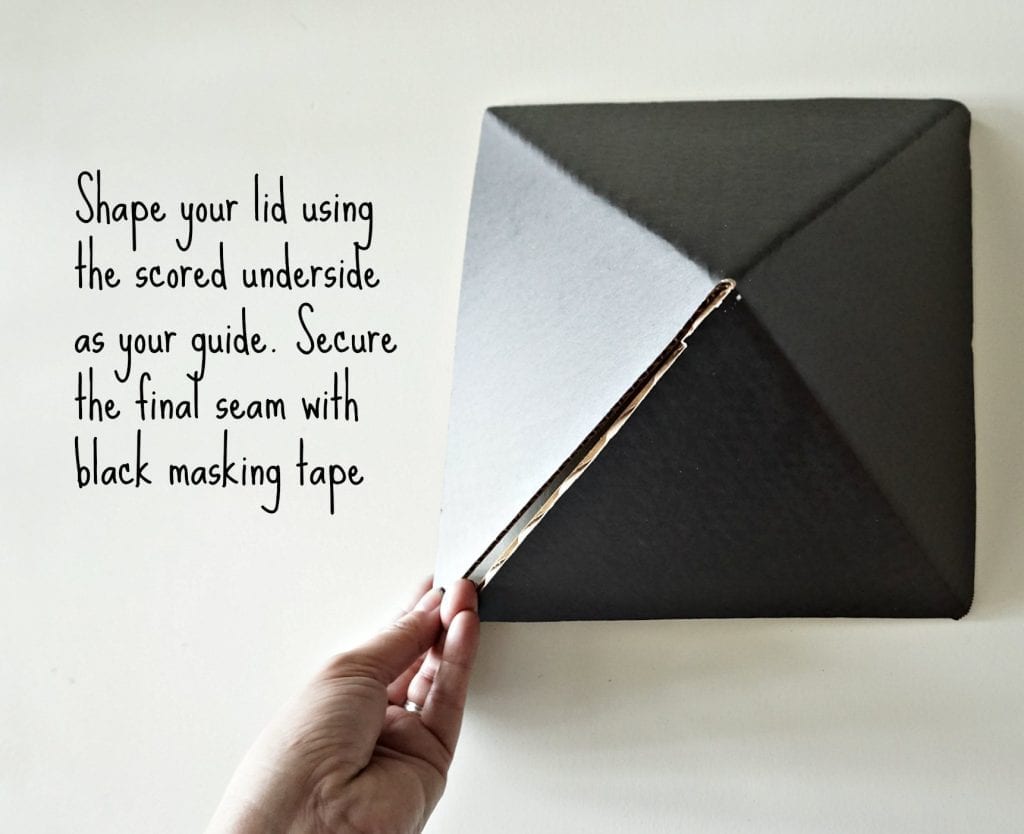
Your superlative is finished! You can remove the lid and driblet an LED tealight within for ambiance. The height is approximately 15.5″ alpine. If yous prefer, you could finish off the exposed paper-thin edges with more black masking tape to give information technology a more than finished look.
Brand the Lamp Posts:
- iii″ ten 72″ Mailing Tubes
- Rustoleum Apartment Black Paint & a castor
Optional (add together a horizontal bar for street signs, or to hang ferns)
- i/2″ dowel rod, 36″ long
- 1/2″ drill fleck
- i/two″ dowel cap (2 needed) – for a finishing touch on
Instructions to add a horizontal bar: Drill a hole 18″ from the top of the mailing tube, pigment the dowel rod. One time dry out, forcefulness through the drilled hole in the mailing tube. Place a ane/2 inch dowel cap on each end of the dowel rod and paint a color of your choice, we are choosing gold.
Create the X Back up Stand
- 2″ x half-dozen″ pine boards cut into three pieces every bit follows: (1 19″ long. // Two vii″ long)
- 3.25″ hole saw
- Kreg Jig
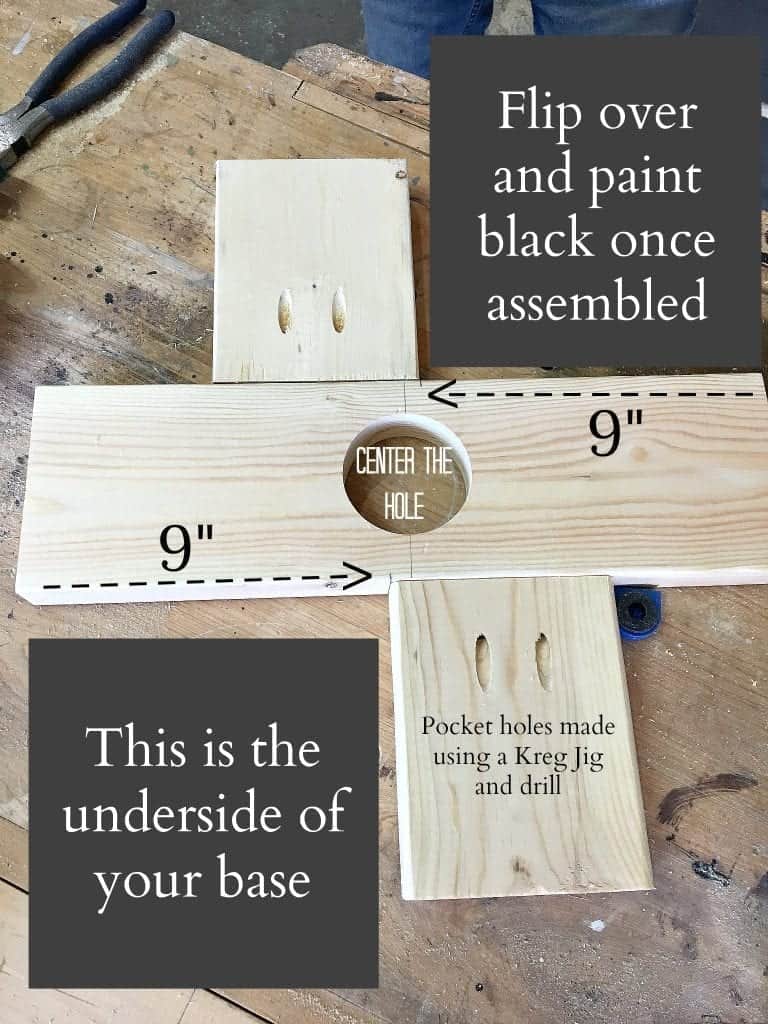
Stand instructions:Cut a 2 inch by half-dozen inch board into iii pieces, one nineteen″ long and two 7″ long boards. In the 19″ board, use a 3.25″ pigsty saw attach to drill. Drill a 3.25″ pigsty in eye of nineteen″ lath. This is your "stand up" for your mail. To make the "X" see diagram: Measured 9″ in from the right and left side of lath. Utilize Kreg Jig to put pocket holes in ane finish of each of the 7″ pieces. Then attached both seven″ pieces to the nineteen″ piece using long screws. Paint black when finished!
Almost 7.5 feet alpine at $xi.75 each
The approximate materials cost to make xv finished street lamps was $175. Hopefully nosotros can reuse these for futurity dances and events for the kids. More than "masquerade" decor is in the works, including paper pom poms, and if we have fourth dimension will will build brick facades and pretty buildings to line the hallways. We also need to decorate the entire school gym so I'll post photos afterwards each event and include all the finishing touches.
Check out the terminal result at my girl's school trip the light fantastic "Masquerade"! The street lamps were a hit!

How To Draw The Street Light Post,
Source: https://www.snazzylittlethings.com/how-to-make-a-street-lamp-out-of-cardboard/
Posted by: lopezdresse.blogspot.com
0 Response to "How To Draw The Street Light Post"
Post a Comment