

How To Create 3d Images In Photoshop
Three-dimensional images can be created in Photoshop either from scratch, by using Photoshop's pre-configured shapes, or by importing wireframes and rendered artwork from 3D applications such as 3D Studio Max or Maya. 3D modeling in Photoshop is processor-intensive, so if you've seen a message when launching Photoshop about insufficient vRAM, you will not be able to work in 3D. Keep in mind that 3D modeling is a complex topic and volumes have been written about it, so this tutorial is merely an introduction where a 3D object will be created using a second image above the background image layer.
This feature works the same in Adobe Photoshop CS6 and CC versions. Photoshop CS5 also has 3D capabilities, but the interface has changed.
- Go to Edit > Preferences > Performance and make sure Use Graphics Processor is checked on. If this option is grayed out, your system does not support Open GL, so your 3D options will be limited and very slow.

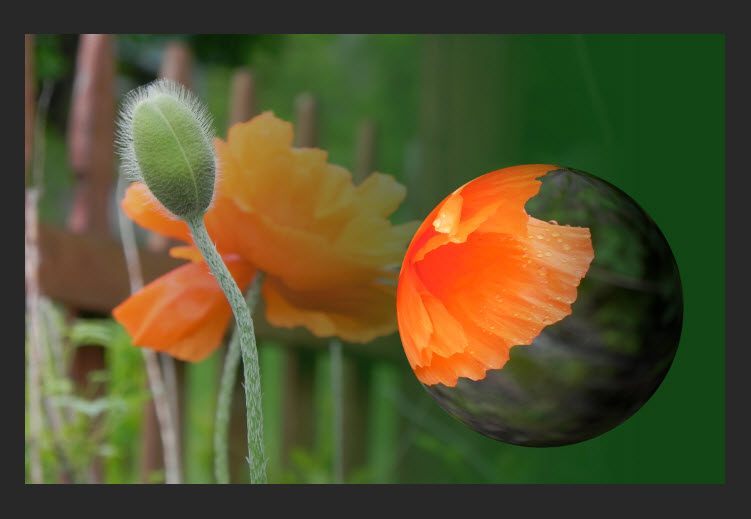
- When a 3D object is created, the image from the layer under the 3D layer will be wrapped around the object. In order to keep the background image intact, I've created a vector rectangle over the entire image with Fill and Stroke set to None. Now I'll create a new empty layer above it.

- To create the 3D object, go to 3D > New Mesh from Layer > Mesh Preset and select Sphere.

- Click Yes when you get the message asking if you want to switch to the 3D workspace.

- The image window will display the Ground Plane and Secondary View. Click the Close View button at the top-left corner of the panel to close the Secondary View.

- From the 3D panel on the Panel Dock, click on Sphere Material.

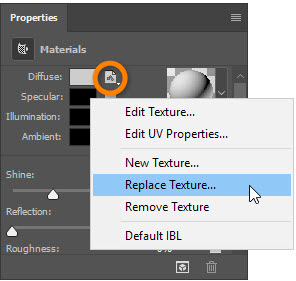
- Next, go to the Properties panel, click the Diffuse menu, and select Replace Texture. In the directory that opens, select your desired image.
- To rotate the image around the 3D wireframe, go back to the 3D panel and click on Sphere.

- The 3D Axes tool will appear in the image window with three "arms" for the X, Y, and Z axes. Hover over the different sections in each arm and watch the tool tips carefully.

- Here, the 3D object has been rotated around all three axes:

- To move the 3D object, go to the Options Bar and select the 3D Drag Object tool.

- Hover just outside the "cube" so that you see only the Move icon without any tool tips and no planes highlighted on the cube, then click and drag the 3D object to the desired location within the image.

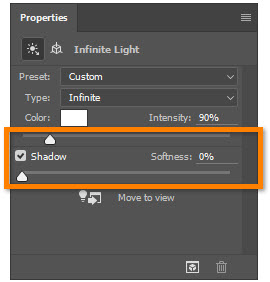
- To adjust the shadow, go to the 3D panel and click on Infinite Light 1.

- The 3D Light Source tool will appear on the object. Drag the handle to adjust the angle of the lighting on the object and the position of the shadow.

- To better judge the effect of the shadow, turn off the Ground Plane grid by going to View > Show > 3D Ground Plane.

- Look at the Properties panel and you'll see options for turning off the shadow or adjusting the softness.
- 3D objects can be rendered to use in video or animations which is a process that takes quite some time. They can also be rasterized as a three-dimensional effect for use in flat art. To rasterize, go to the Layers panel, right-click (PC) / Control-click (Mac) on the 3D layer and choose Rasterize 3D.

- The layer is no longer a 3D object.
How To Create 3d Images In Photoshop
Source: https://www.webucator.com/article/how-to-create-a-3d-sphere-in-adobe-photoshop/
Posted by: lopezdresse.blogspot.com
0 Response to "How To Create 3d Images In Photoshop"
Post a Comment